Thursday, April 16, 2009

Carlsbad Flower Fields

The kid & I got in the car & drove up to the Carlsbad Flower Fields today. We had fun. It was educational for her since she was 'I wonder what this smells like mode.' She stopped to smell the roses, carnations, sweet peas (what a beautiful scent!) and other flowers.

Ranunculus


Sweet Peas

They had some striking poinsettias in the green house. I'd never seen any like this before. They're called Flaming Spheres. Fitting, yes. Interesting name, yes.


Random end note about the Fields: The kid & I had a great time. The weather was nice. This close to the coast, it's good to have at least a light sweater. It's right next to the Carlsbad Outlet whatever place. We went there to grab some lunch at Ruby's Diner. There were numerous options for eating in the area. There were even picnic tables at the Flower Fields. The Fields gives entrance discounts for seniors, auto club members & military families. Kids under 3 are free. They have a nice outdoor play area. It wasn't super for the 3 year old set only because there were so many much bigger kids everywhere, even playing on the equipment meant for the 5 & under age group. They are open through May 10th. Their website is: http://www.theflowerfields.com/

Sunday, March 15, 2009

Happy Birthday to me!!!

It's my birthday!!! In honor of my day (March 15), everything is on sale in my Etsy shop! http://HandmadebyPam.etsy.com
Come on by & take a look.

Wednesday, March 11, 2009

International shipping

I just had my first international sale via Etsy last week. I had been hoping that at some point this would happen & was thrilled when I saw that someone from across the globe had made a purchase from my shop. I'm not usually a worrier but I was a little concerned. Should I have packaged the item differently? Would the item make it in it's current condition? Would it end up stuck in customs? Would it arrive at all? I sent a note to my customer informing them when the item shipped & asking that they let me know when it arrives. I received a message from my customer today that the item had indeed arrived & was in perfect condition. Sigh of relief! Ahhh! Interestingly, I put the item in the mail on Thursday the 3rd of March & it arrived Wednesday the 11th. I've seen mail take several days to get to different parts of the county I live in, so for mail to move so quickly is quite surprising. The postal services of each country apparently worked mighty quickly & it must have sped through customs. It's so nice to have someone receive something I've sent & in this case, it was extra special since it was so far.

I have another parcel enroute to another country from a sale this week. The postal worker sorta smirked & smiled at the same time when I smoothed down the metered stamp/postage thing on the package. I laughed & explained that I hadn't sent much out of the country & was still just a little detail oriented about it. I have my fingers crossed that this new customer receives their item in it's original condition in a timely fashion. Will have to report back :-)

International shipping is not all that different from mailing an item in the U.S. There are a few things that helped me in the process of figuring things out. My advice: 1) make sure that you weigh the item, everything you will be packaging it in & the box/bubble mailer/envelope (each ounce when you ship to Canada is only .24 cents but to, say Australia goes up to .80 cents, not a huge amount of money but it sure can add up if one is less than careful), 2) like in the U.S., make sure you are clear in what category your item fits (envelope, small package, etc.), 3) check out the United Postal Services website on international shipping for pricing & information (see below), 4) package your item well, 5) fill out the customs form & afix it to the front of the package. Rumor has it that some postal workers will say that you don't need a customs form. The one who helped me last week seemed to think that it was a good idea & said that it would be less likely to be opened at customs since it said what it was on the form.

FYI, the USPS has information on each country & the types of items that are not accepted in each specific country.

USPS first class international mail: http://www.usps.com/prices/first-class-mail-international-prices.htm

If you have anything to add about international shipping & your experiences, I would love to hear them!

Wednesday, February 11, 2009

It's been a while, so I thought I'd share one of my favorite items (a set in this case) of what I've made recently
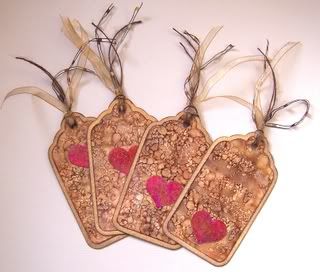
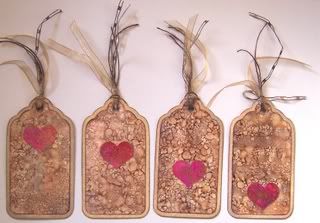
The quick & dirty tutorial:

"Ingredients & tools" cardstock, glossy paper, something to cut tags, hearts & ribbon (scissors, punches, die cut machine, whatever works well for you), adhesive (glue runner, glue stick...), ribbon, metallic mixative & alcohol ink plus an alcohol ink applicator & some felt cut to size for the applicator. You may also want to use ink &/or chalk ink to give them a little punch. I did.

You will definitely want something to protect your working surface & maybe even an apron for yourself. Alcohol ink stains. Badly. Don't ask me how I know. If you are quick enough, you can remove it with alcohol or blending solution (depending on the surface, of course).

I made four tags, so my numbers below will reflect that

1) Cut out four of each of the following:

a) tags out of cardstock (I used white & then inked them but it would have saved me a little time to choose a coordinating color in the beginning).

b) tags from glossy paper a little smaller than the cardstock tags. I find that I prefer the cream colored glossy paper over the white.

c) hearts

d) ribbon &/or fiber for each tag

2) Here's where you need that protective surface! I use a 15"x18" non-stick craft sheet from Inksentials (Ranger Industries, I believe) & I love it. Grab your glossy tags, alcohol ink in the color(s) or your choice, your applicator & felt. Put your felt onto the applicator. Hold your applicator so that the felt side is facing up, carefully open up the alcohol ink & tilt it toward your applicator. When the two meet, squeeze the applicator gently for about 2 seconds. Do the same with the next alcohol ink, if using. Apply the inked applicator to your glossy tags. I find that "pouncing" works well for me. The alcohol ink dries fairly quickly. Set the tags aside.

3) Still on the protective surface, grab your hearts, the metallic mixative & whatever colors of alcohol ink you choose. I used the gold metallic mixative. I think I used the wild plum, cranberry & red pepper alcohol ink. Grab your alcohol ink applicator. At this point, I would toss the old felt & grab a new one but whatever works for you. Following the instructions, shake the bottle of metallic mixative until you hear the little ball in it rattle. Make sure the cap is on properly. If you have forgotten to do this, Dawn dishsoap works really well to remove the mixative from hand & jeans. Not sure about anything else, though. Anyway, apply a squirt or more of the mixative to the felt. Take the applicator & apply the mixative to your hearts. You can either coat the entire heart or leave chunks of space. Experiment to see what you like the best. I find that I like them both ways. Next, set this felt aside & grab a new one (or reuse the same old one). Apply alcohol ink to the applicator as in step 2. Pounce it around the heart until you feel like you are done. This should dry fairly quickly.

4) optional: ink your individual pieces if you like. Pigment ink wouldn't dry for me on the glossy paper until I used a heat tool.

5) Assemble your tags. Adhere the small tag to the larger one & then the heart on top of the glossy tag. Tie it with ribbon &/or fiber & you are all done!

I hope you liked this tutorial!

Thursday, January 15, 2009

Scrapbook Club at Pink Pineapple


I'd been wanting to take this "class" ever since I heard about it (maybe 1 1/2 years ago?). Scheduling had been a concern since I'm not that close to Vista & I'm responsible for a little kid until daddy gets home. I finally figured out that I could do it when I had another commitment on the same night of the month but then decided to hop in & go for it last week. The class is actually what's called a Scrapbook Club (formerly known as the Scrapbook Book club). It's up at Pink Pineapple Scrapbooks & is taught/led/coordinated by Elena Etcheverry of Scrapbook Royalty. The book this month is the hot-off-the-press Designing with the Divas by Danielle Forsgren & Rayme Sciaroni. Danielle was there & told us about the book & the cable radio show she does each week with Rayme. We each made some really cute little Artist Trading Cards (ATCs) as our make n' take (led by Danielle). Rayme stopped in & chatted with the group. At the end, Elena passed out a fabulous kit with the challenge to make a mini album & to distress it. A fun evening all around. I'm looking forward to playing with the challenge. This is what came in my kit! Fun things to play around with.


Links:
Scrapbook Royalty: website http://www.scrapbookroyalty.com/
Diva Craft Lounge blog talk radio (Designing with the Divas):http://www.blogtalkradio.com/DivaCraftLounge/2008/11/12/Diva-Craft-Lounge


Wednesday, December 17, 2008

Some art with my kid

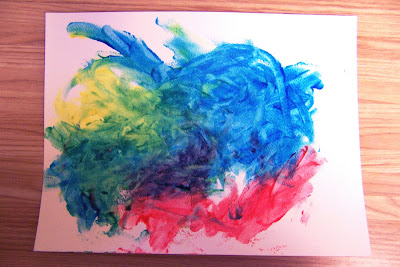
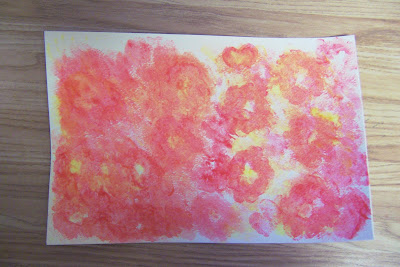
Normally, my little girl & I get out every day. Monday I just wasn't in the mood to go out. Then it rained (not normally something that keeps us in) & we got a call asking if the guys from the restoration could come by to start some work (we had some flooding from our washing machine a weeks ago). Sure, what the heck. It was a reasonable enough excuse to stay home. So, among other things, my three year old & I decided to do some finger painting. Here are some pictures of some of my favorites.


Thursday, December 11, 2008

Holiday Hit List pics

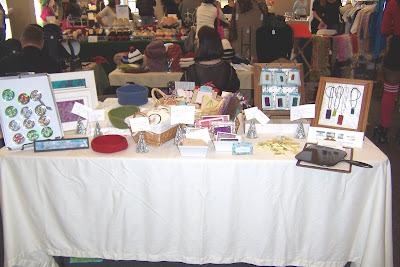
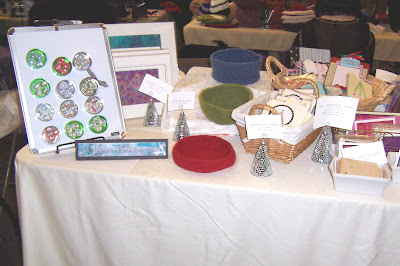
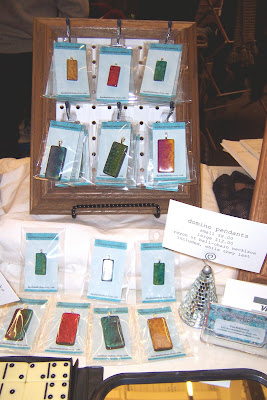
Here's a quickie post with some pictures of my table from the craft fair where I sold on Sunday (North Park Craft Mafia's 2nd Annual Holiday Hit List).